
Quotec LIVE | Designer | Gable & Skillion Carports
Overview
This guide walks you through designing and configuring Gable and Skillion Carports in Quotec LIVE.
You'll learn how to select your preferred roof style, configure building dimensions, adjust eaves and column positions, remove gable infills and review your completed design.
Before getting started, we recommend reading Designing Carports in Quotec LIVE for an overview of the differences between Gable and Skillion Carports.
Step 1 — Select Your Carport
To begin:
-
Create a new job in Quotec LIVE.
-
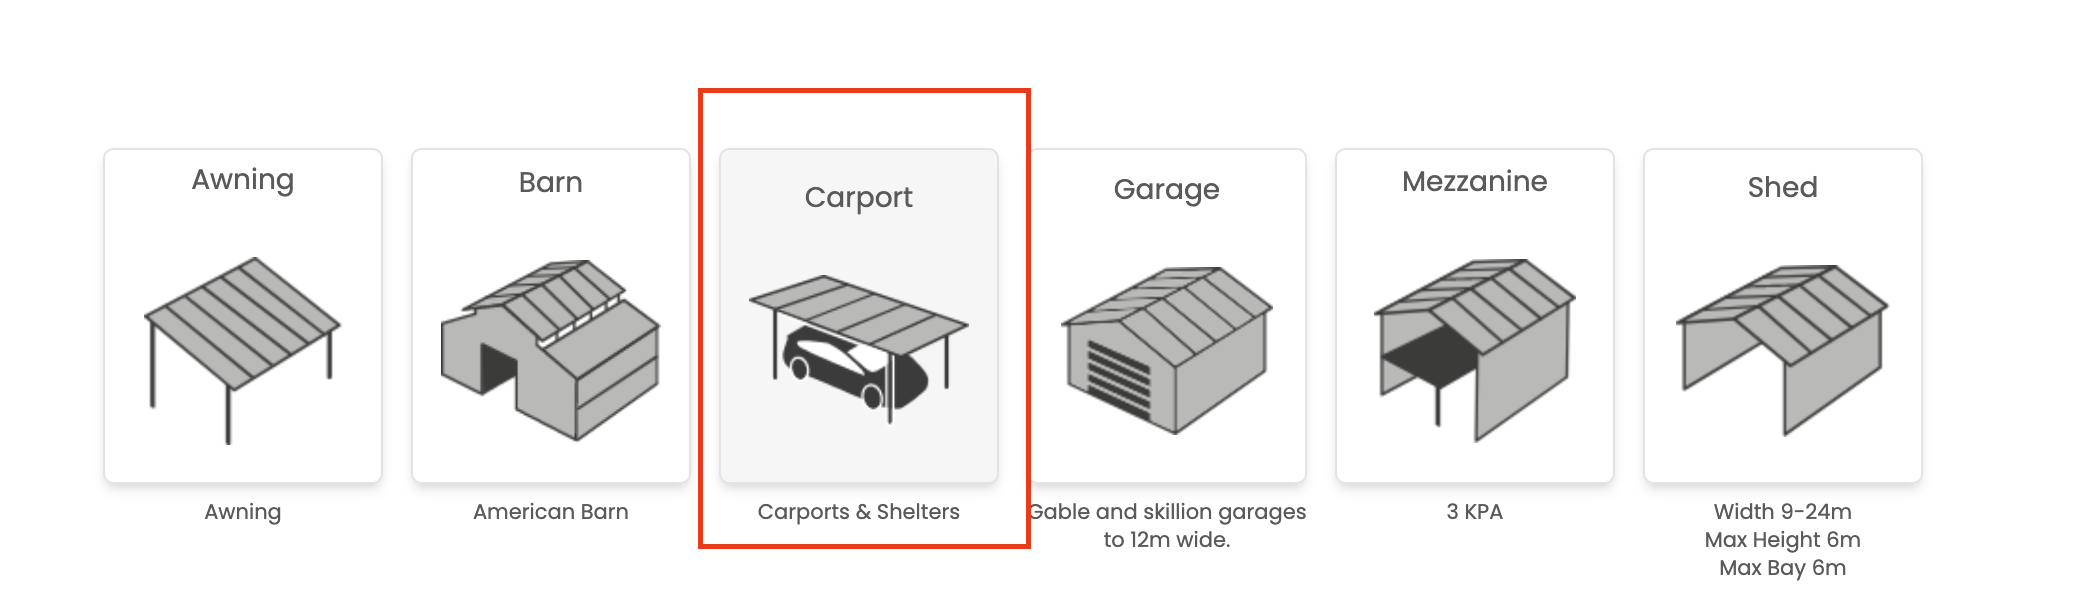
At the building selection screen, select Carport.
-
Continue through the building setup process to access the Designer.
Choose Your Roof Type
Once inside the Designer, open the Building configuration panel.
At the top of the panel, you'll find two roof style options:
Skillion: A single-sloping roof, ideal for contemporary designs and larger covered areas.
Gable: A dual-pitched roof with a central ridge, ideal for traditional rooflines and designs that complement existing pitched-roof buildings.
Select the appropriate roof type by clicking its icon.
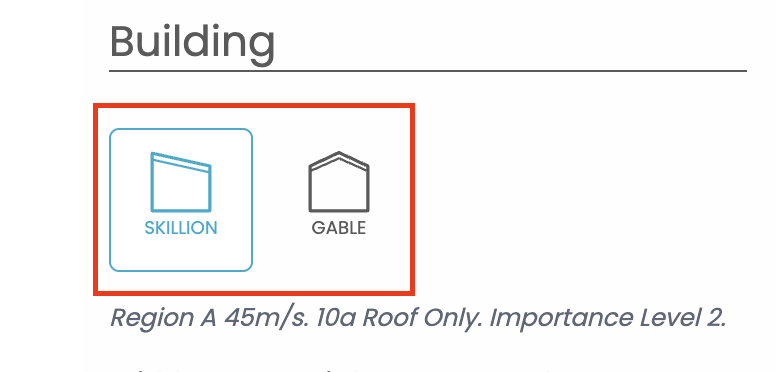
The selected roof type is highlighted in blue.
Design width limits:
|
Roof type |
Maximum design width |
|---|---|
|
Gable Carport |
9 metres |
|
Skillion Carport |
12 metres |
Once you've selected your roof type, you can begin configuring the building dimensions and structural layout.
Step 2 — Configure Your Building Dimensions
The Building configuration panel allows you to define the main dimensions and roof characteristics of your carport.
Enter Your Dimensions
Enter the required measurements into the following fields:
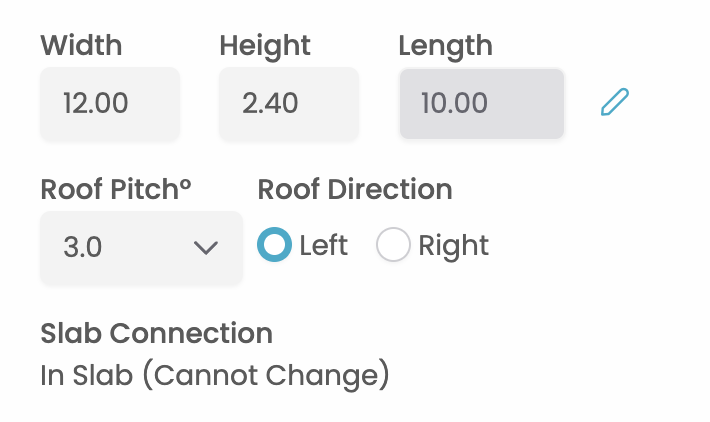
Width
The overall building width. The maximum supported width depends on whether you've selected a Gable or Skillion Carport.
Height
The building height, which should be considered alongside the required vehicle clearance and roof configuration.
Length
The overall length of the carport, determined by the required covered area and number of bays.
Select Your Roof Pitch
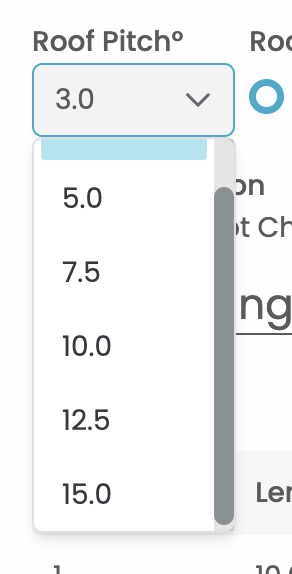
Use the Roof Pitch° dropdown to select the required roof angle.
Available roof pitches depend on the selected roof type and supported design configurations.
Select Your Roof Direction — Skillion Only
For Skillion Carports, use the Roof Direction setting to choose between Left and Right.
This determines the direction of the single-sloping roof.
Review the building model to confirm the roof slopes in the intended direction.
Review the Slab Connection
The Slab Connection field displays the selected connection arrangement.
Some connection options may be fixed by the selected building configuration and cannot be changed.
Tip: When designing carports for caravans, boats or larger vehicles, consider the usable clearances beneath the roof rather than relying solely on the overall building dimensions.
Step 3 — Configure Bay Spacing
Bay spacing determines the arrangement of structural frames along the length of your carport.
The Designer allows you to configure individual bays or explore suggested bay arrangements based on the required building length.
Adding or Editing Bays
Under Bay Spacing, you can:
-
Select Add to introduce an additional bay.
-
Use the edit icon to modify an existing bay length.
-
Use the delete icon to remove a bay.
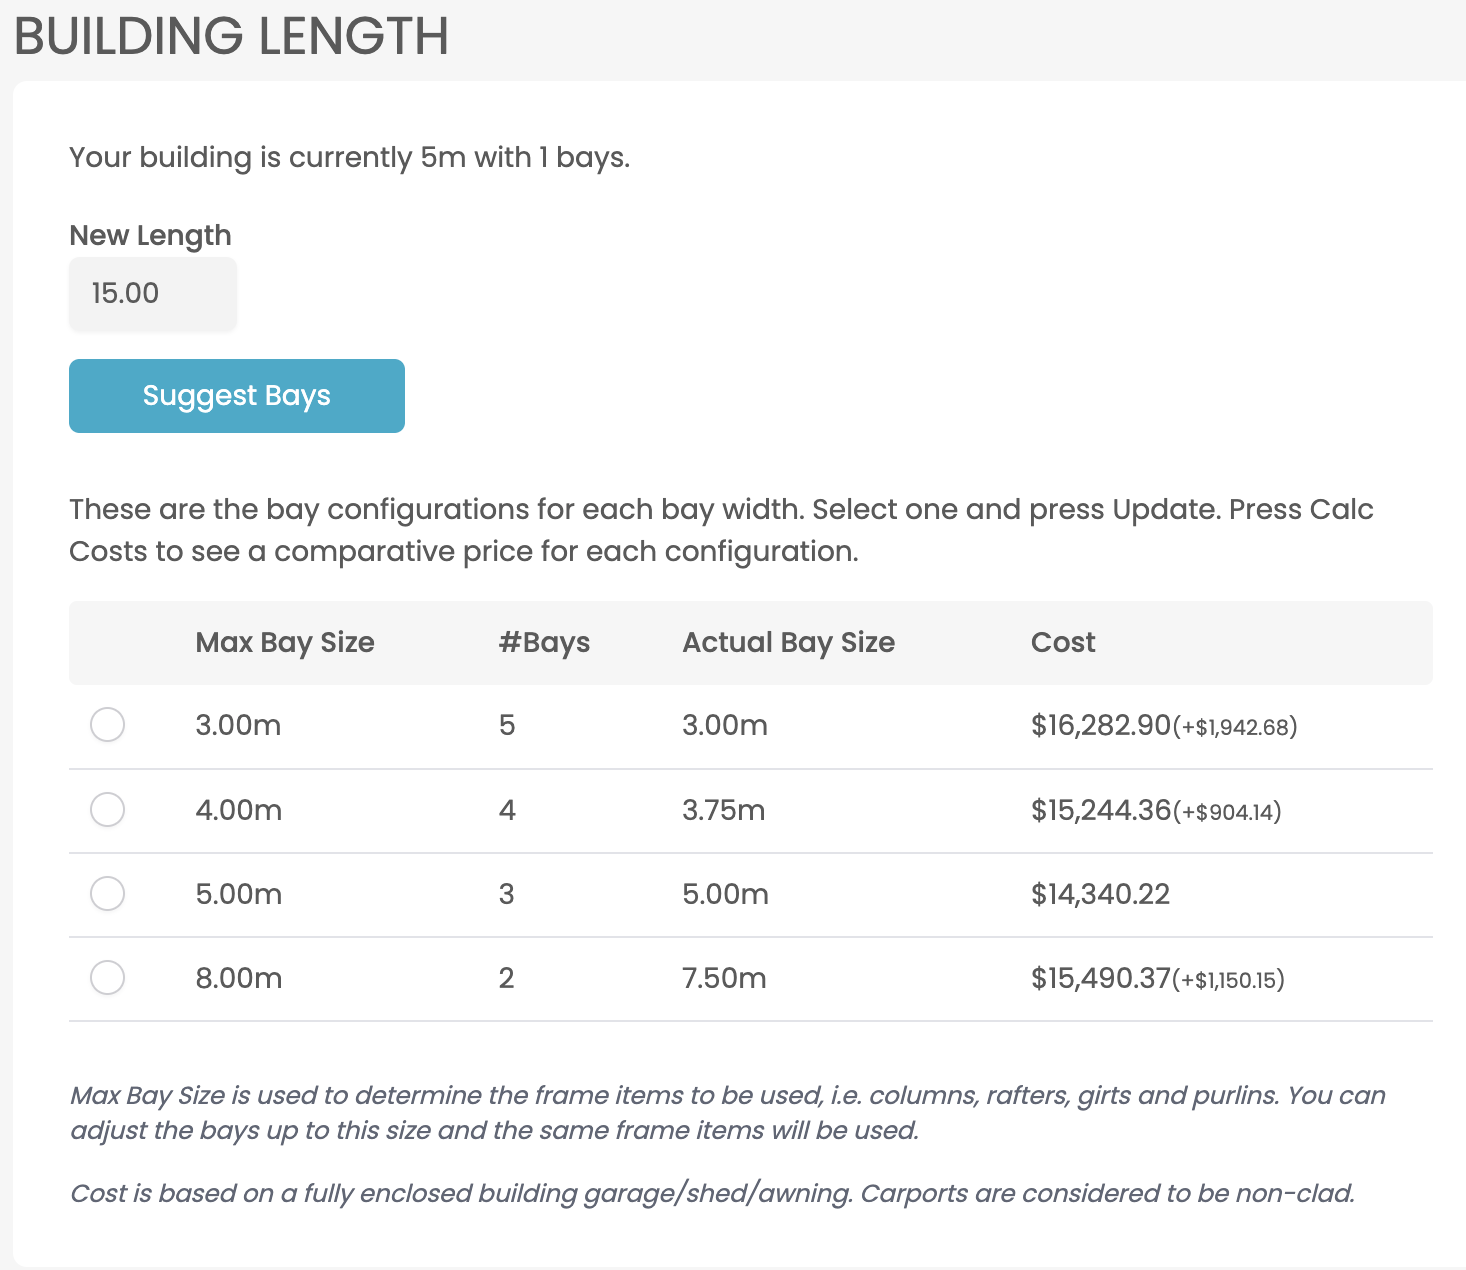
Using Suggest Bays
If you're unsure how to divide the building length, Quotec can suggest alternative bay configurations.
-
Select the edit icon beside Length.
-
Enter the required New Length.
-
Select Suggest Bays.
-
Review the suggested configurations.
The results display:
|
Field |
Description |
|---|---|
|
Max Bay Size |
The maximum bay size used for the suggested structural arrangement |
|
#Bays |
Number of bays required |
|
Actual Bay Size |
The resulting length of each bay |
-
Select your preferred configuration.
-
Select Update to apply the arrangement.
Use Calc Costs to compare pricing between different bay configurations.
Important: Bay spacing influences the structural frame arrangement and material requirements. Review the resulting design before proceeding with your quotation.
Step 4 — Configure Eaves and Inset Columns
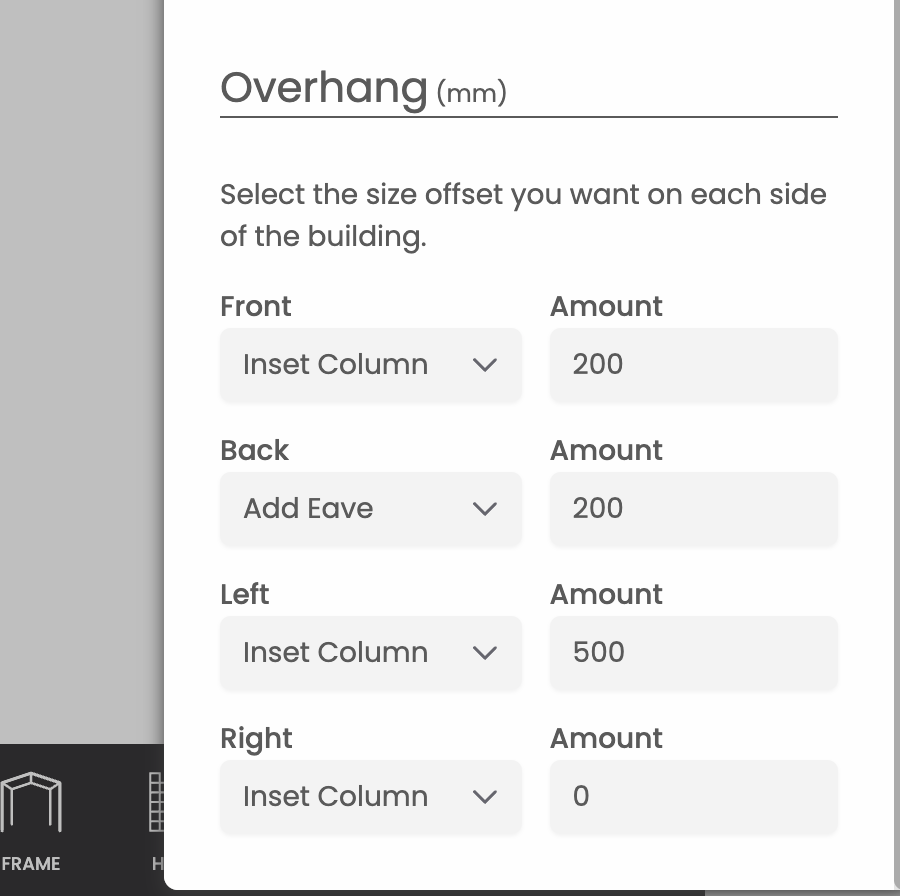
Quotec allows you to adjust the roof overhang and supporting column positions using the Overhang (mm) settings.
Offset value must be between 200 and 1200m.
These options provide greater flexibility when designing around site requirements, vehicle access and architectural preferences.
Understanding Eaves and Inset Columns
Add Eave
An eave extends the roof beyond the supporting structure, creating additional roof overhang.
This can be useful where additional roof coverage or a particular architectural finish is required.
Inset Column
An inset column allows the supporting column to be positioned inward from the roof perimeter.
This can provide greater flexibility in column placement and the relationship between the roof and supporting structure.
How to Add an Eave
-
Open the Building configuration panel.
-
Scroll to Overhang (mm).
-
Locate the required side — Front, Back, Left or Right.
-
Select Add Eave from the dropdown.
-
Enter the required measurement in the Amount field.
-
Review the updated building model
How to Inset a Column
-
Navigate to Overhang (mm).
-
Locate the side you wish to modify.
-
Select Inset Column from the dropdown.
-
Enter the required inset distance in millimetres.
-
Review the updated column positions.
Example Configuration
The following example demonstrates how different settings can be applied to individual sides of the building:
|
Building side |
Configuration |
Amount |
|---|---|---|
|
Front |
Add Eave |
200 - 1200mm |
|
Back |
Add Eave |
200 - 1200mm |
|
Left |
Inset Column |
200 - 1200mm |
|
Right |
Inset Column |
200 - 1200mm |
Each side can be configured separately, subject to the available design and engineering parameters.
Tip: After applying an eave or inset column, review the building from multiple perspectives to confirm the roof coverage and column positions are appropriate for your customer's requirements.
Step 5 — Gable Carports: Removing the Gable Infill
Available for Gable Carports
One of the enhancements introduced in Version 2.09 is the ability to remove gable infills entirely.
A gable infill is the triangular cladded section beneath the pitched roofline at the end of a Gable Carport.
Traditionally, this section is enclosed to create a defined roofline.
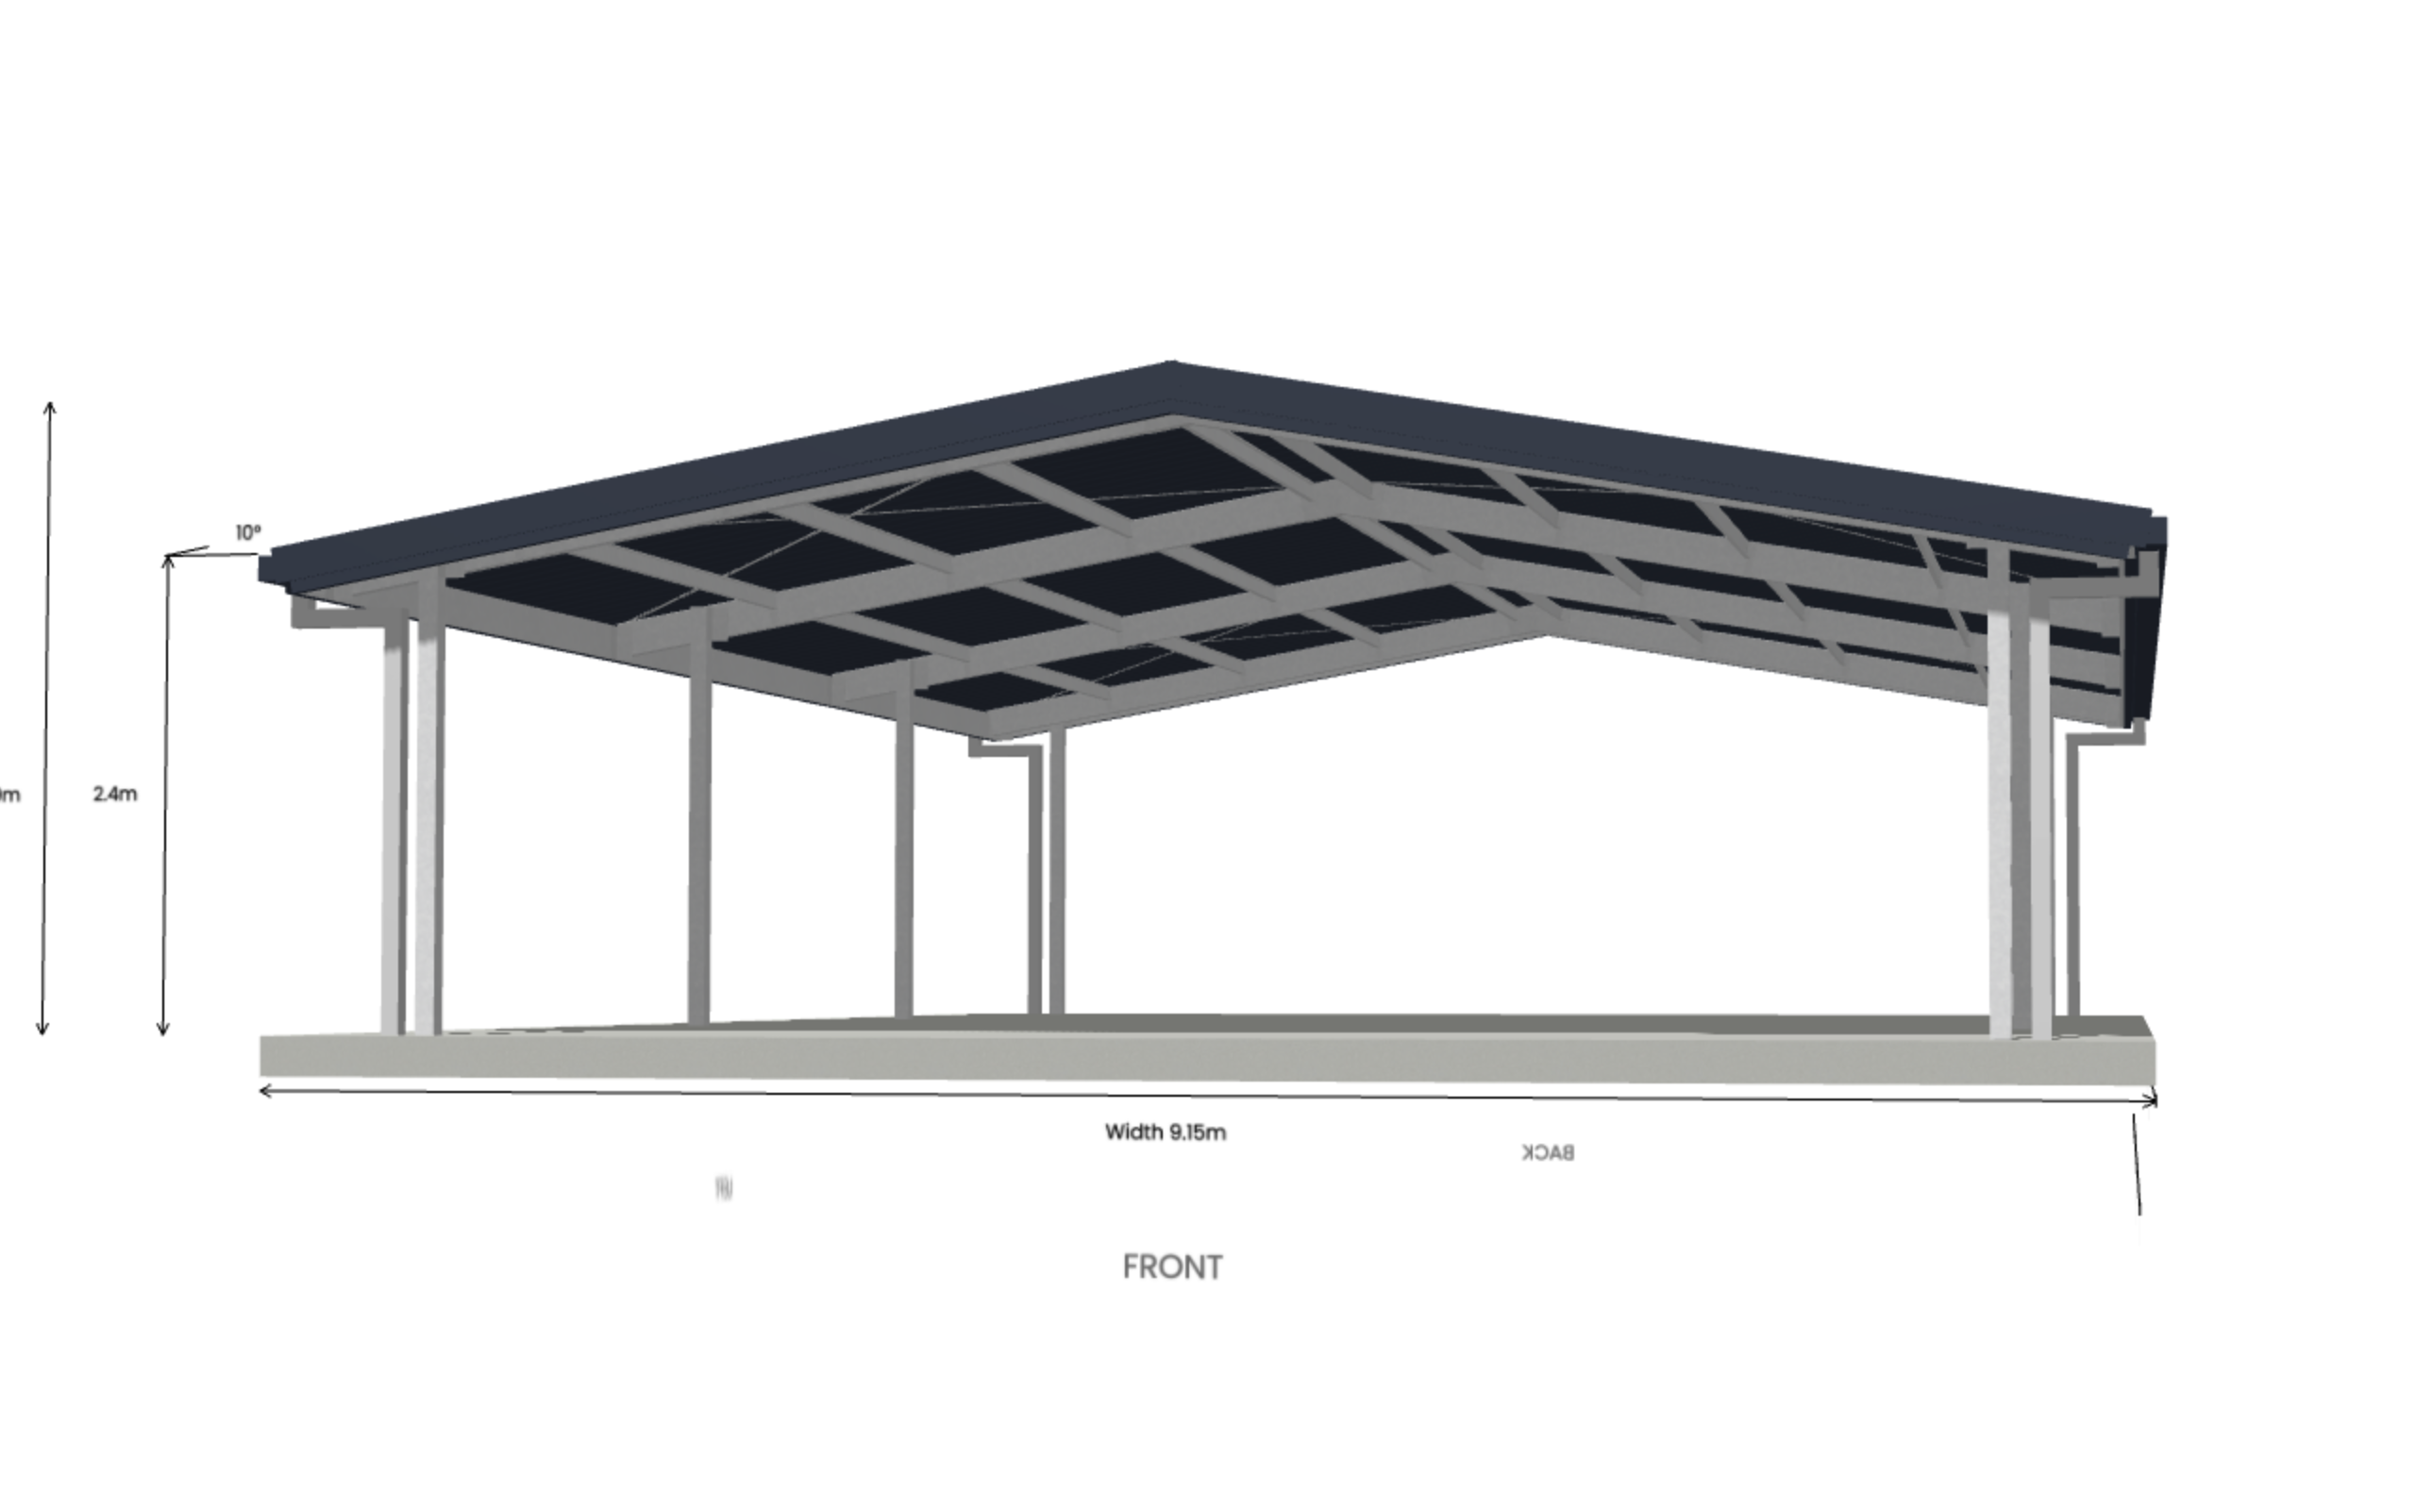
Removing the infill creates a more open appearance while retaining the distinctive dual-pitched roof structure.
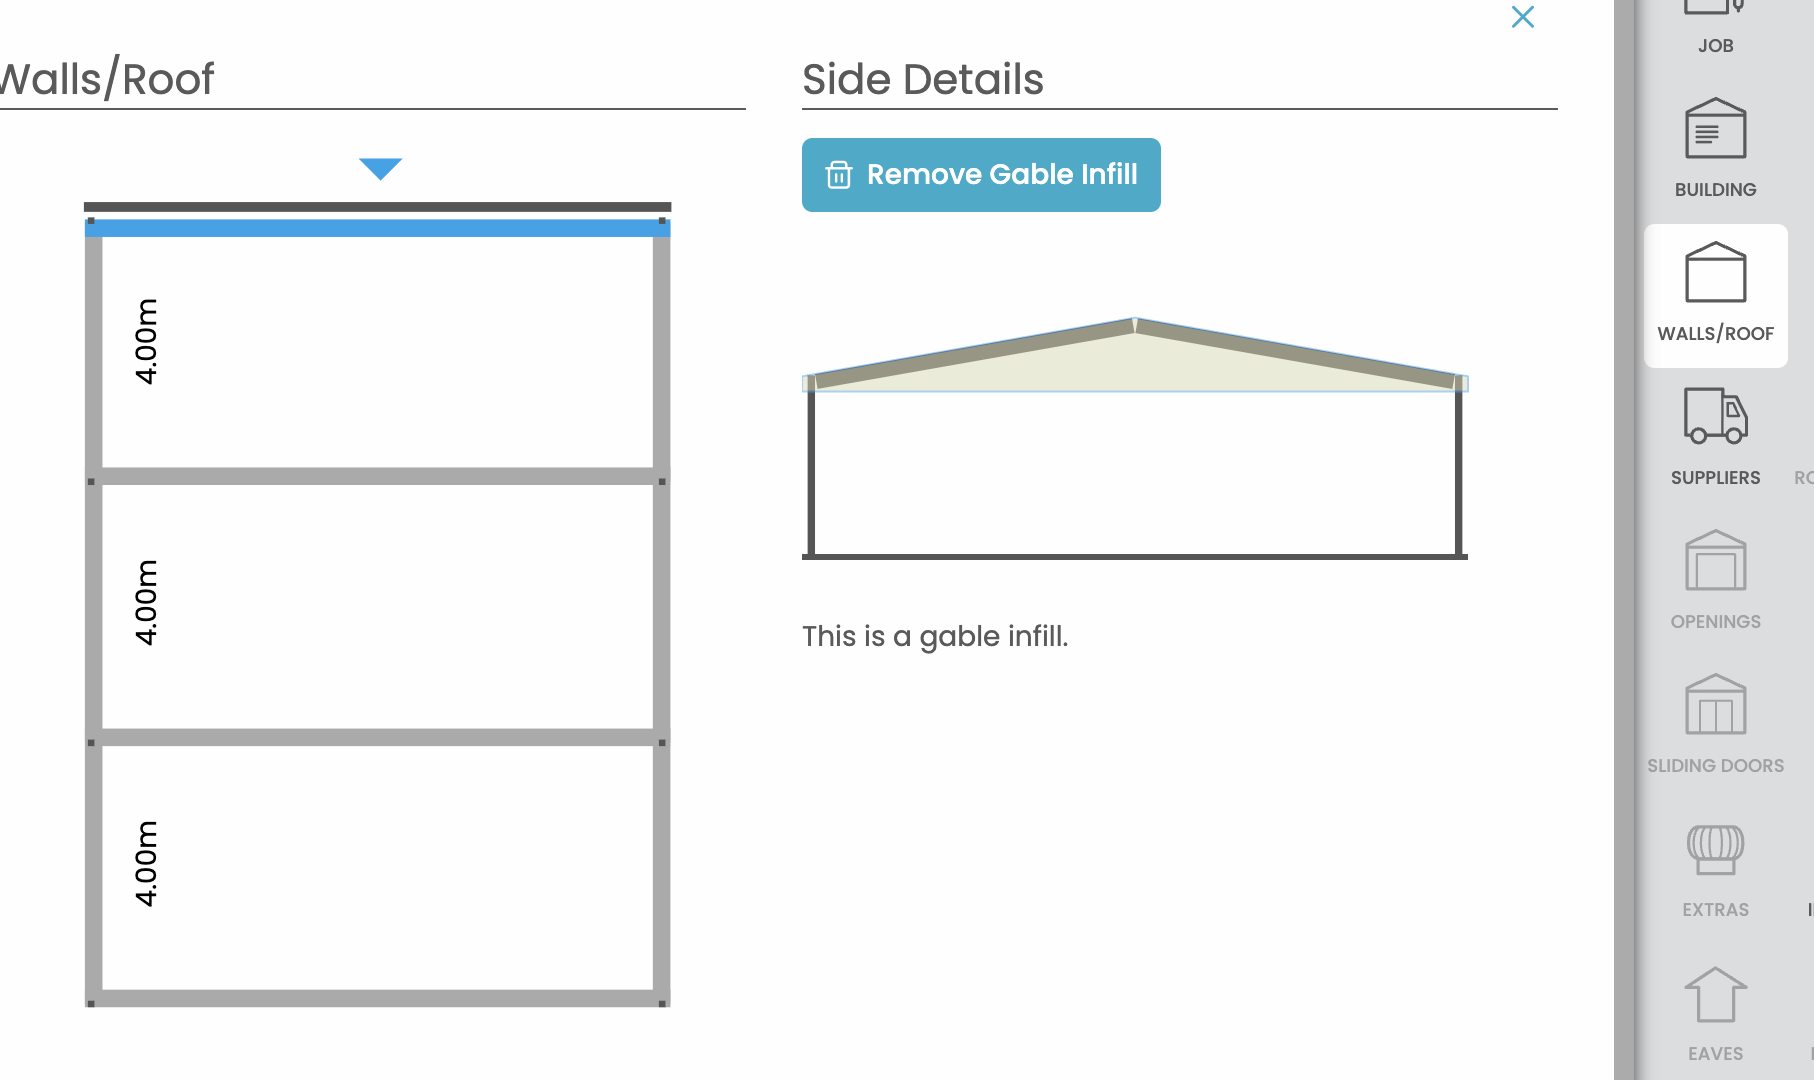
How to Remove a Gable Infill
-
Ensure Gable is selected as your roof type.
-
Navigate to the relevant gable end in the Designer.
-
Open the Walls/Roof configuration.
-
Locate the Side Details section.
-
Select Remove Gable Infill.
-
Review the updated building model.
Reviewing the Open-Gable Design
Once the infill has been removed, the triangular cladding beneath the roofline is no longer displayed.
This creates a cleaner, more open architectural finish and may allow additional natural light and airflow through the carport.
Tip: Open-gable designs can be particularly appealing for customers seeking a contemporary appearance or a carport that visually integrates with surrounding outdoor spaces.
Step 6 — Skillion Carports: Designing Up to 12 Metres Wide
Available for Skillion Carports
Version 2.09 increases the maximum supported Skillion Carport design width to 12 metres.
This allows members to explore larger covered areas for multiple vehicles, caravans, boats and equipment.
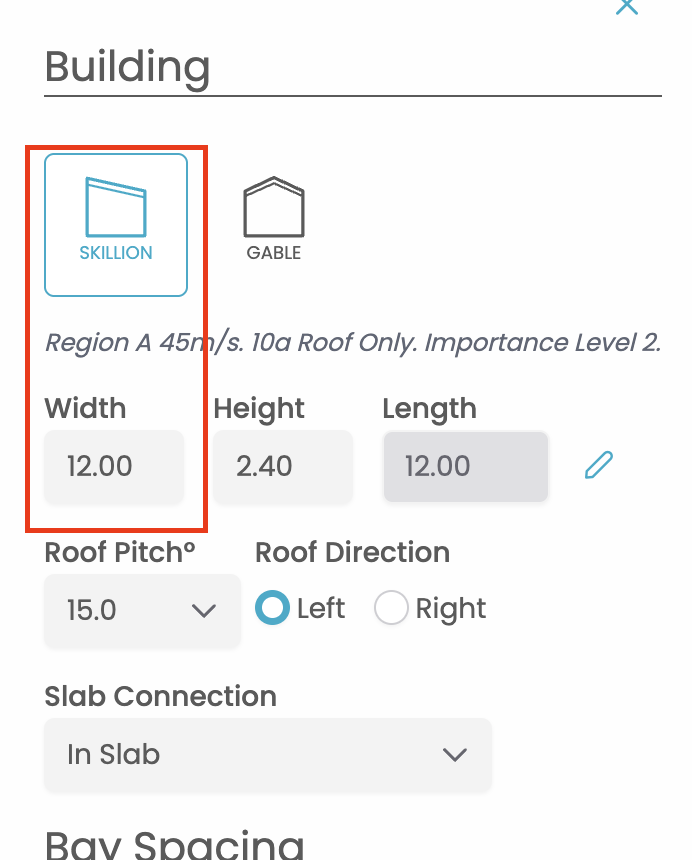
How to Configure a Wider Skillion Carport
-
Open the Building configuration panel.
-
Select Skillion as your roof type.
-
Enter the required Width, up to 12 metres.
-
Enter the required Height and Length.
-
Select the appropriate Roof Pitch.
-
Choose the required Roof Direction — Left or Right.
-
Configure the Bay Spacing.
-
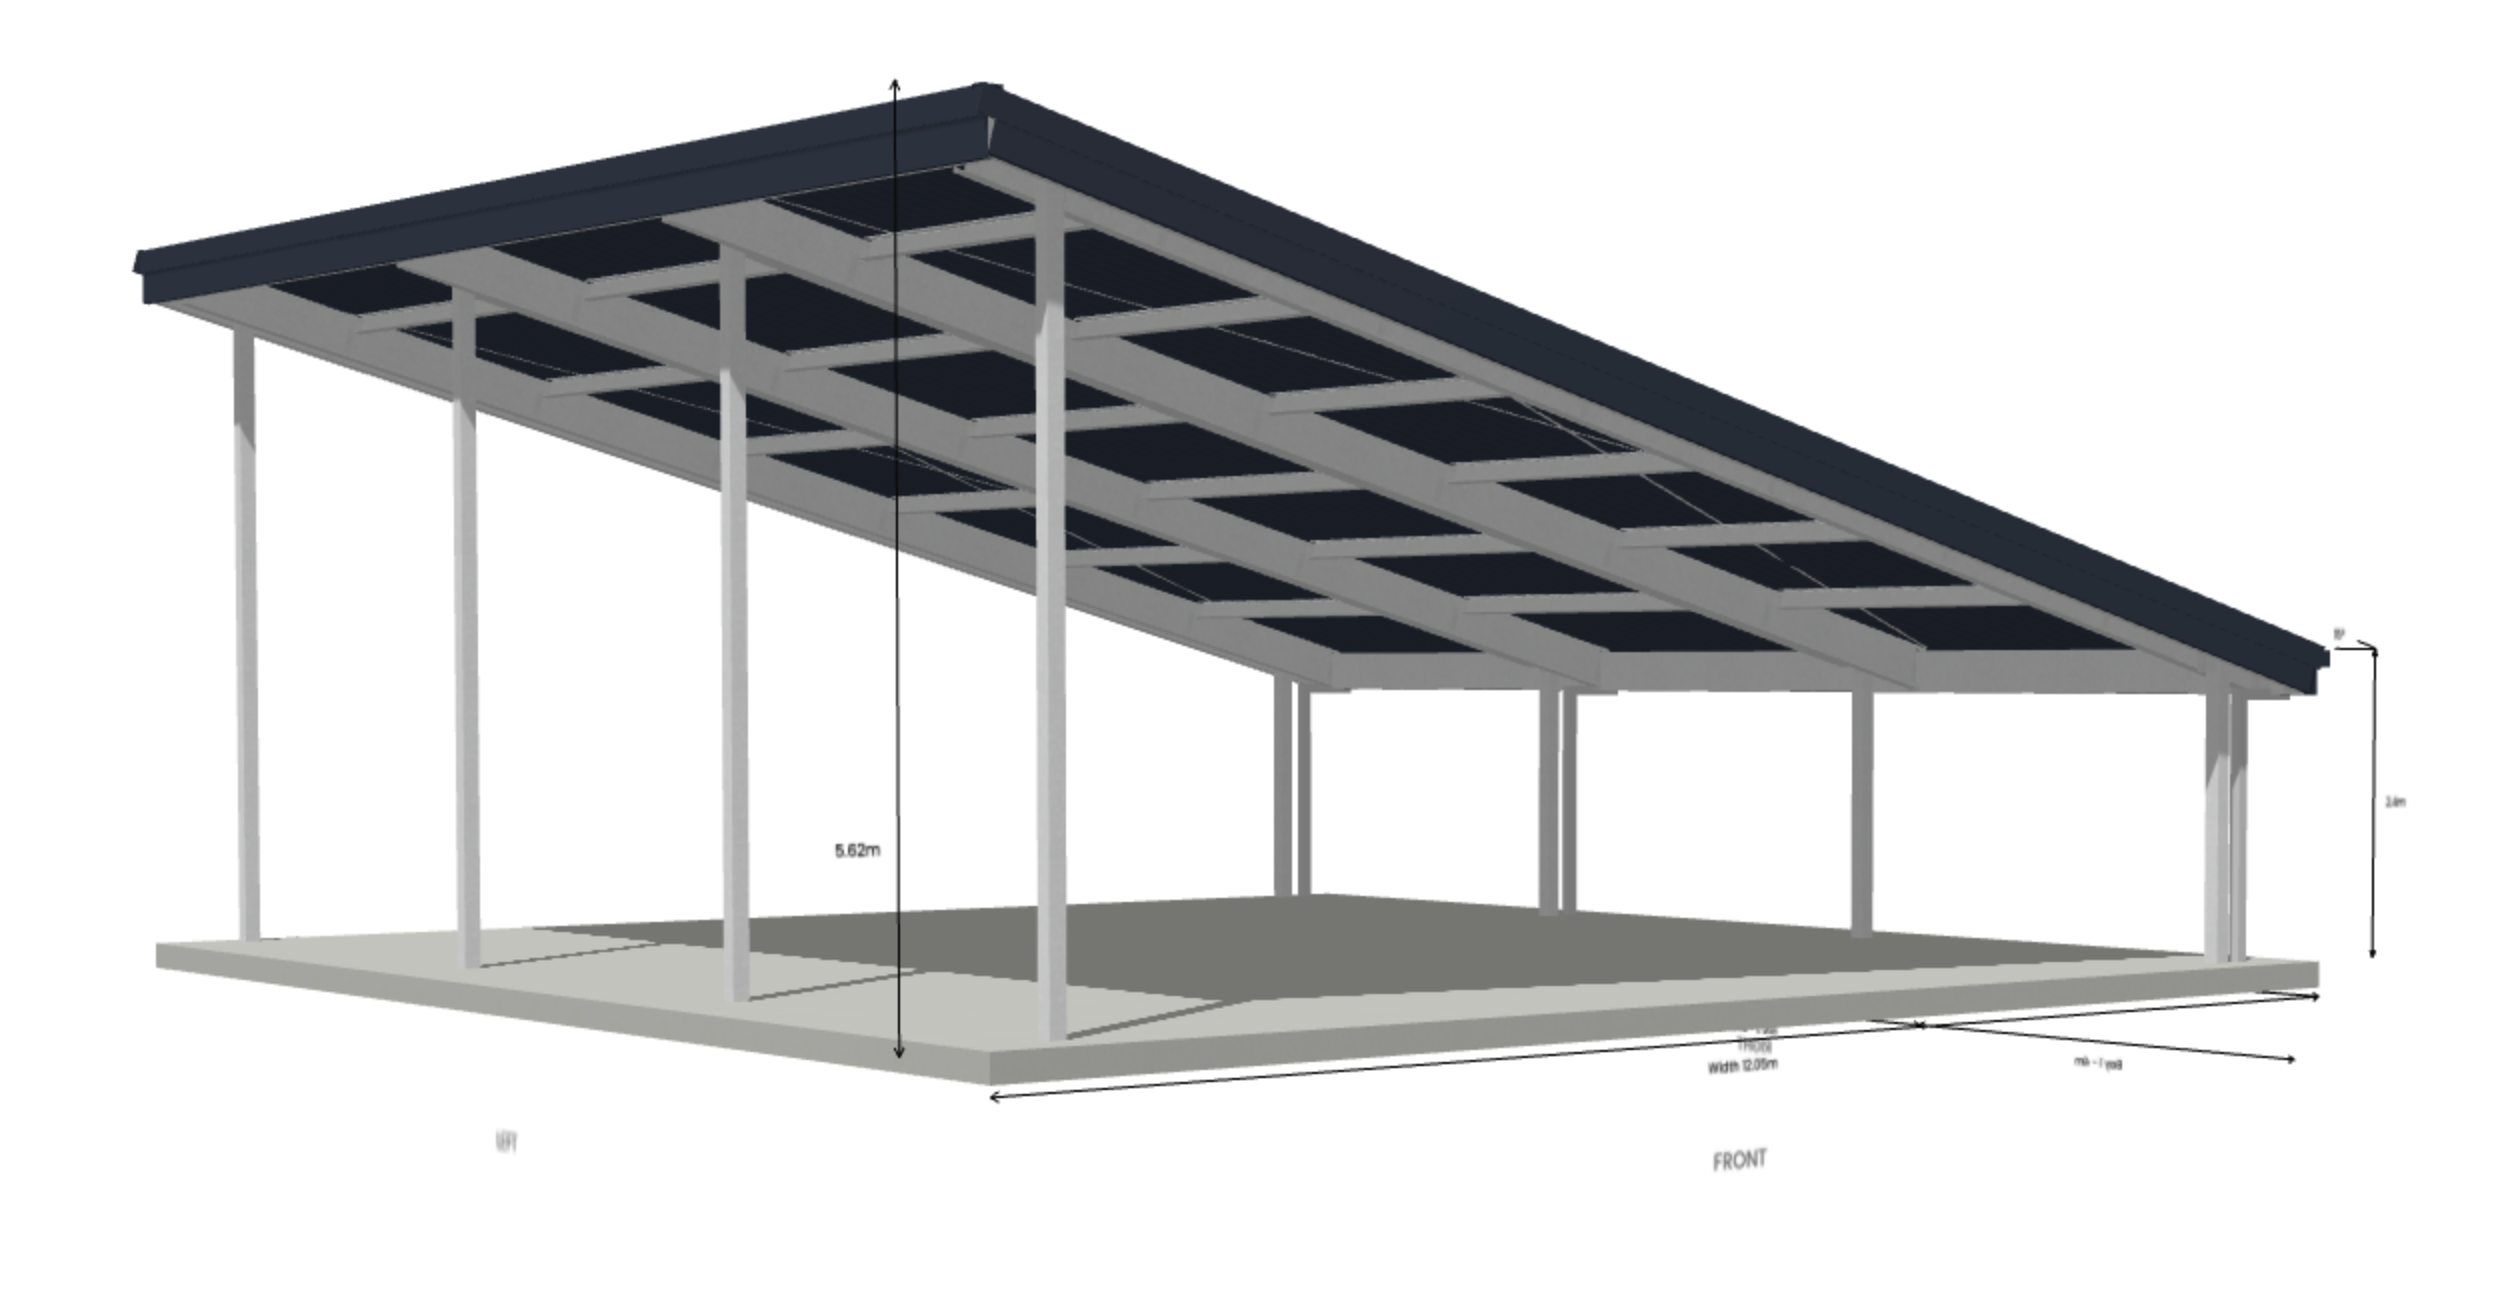
Review the completed building model.
Reviewing Your Design
Once the building dimensions have been configured, use the Designer's viewing controls to inspect the structure.
Pay particular attention to:
-
Overall roof dimensions.
-
Column spacing and positions.
-
Roof slope and direction.
-
Structural framing.
-
Usable vehicle clearances.
[Insert screenshot: Skillion12m picture.png]
Important: The 12-metre maximum refers to the supported design width. It does not necessarily represent a clear structural span or guarantee a particular vehicle clearance. Available configurations remain subject to the applicable engineering requirements.
Step 7 — Review Your Completed Carport Design
Before preparing your customer quotation, review the completed design to ensure it meets the intended requirements.
Final Design Checklist
- Correct roof type selected — Gable or Skillion.
- Building width, height and length confirmed.
- Roof pitch and direction reviewed.
- Bay spacing and frame positions checked.
- Eaves and inset columns configured correctly.
- Gable infill selection confirmed, where applicable.
- Usable vehicle clearances checked.
- Applicable engineering and site requirements reviewed.
- Pricing and material calculations reviewed.
Using the Designer Viewing Controls
The Designer provides several viewing options to assist with reviewing the building.
These include:
-
Front, Left, Back and Right: Review individual elevations.
-
Plan: Review the building layout from above.
-
3D: Inspect the overall building appearance.
-
No Roof: Review the structure without roof cladding obscuring the framing.
-
Frame: Inspect the structural frame arrangement.
Use these views to confirm the building layout and identify any configuration changes required before proceeding.
Need Assistance?
If you have questions about a particular carport configuration or need assistance with the available design options, please contact the Quotec Support Team.
For further information, visit the Quotec Help Centre.
Related Help Files