
AMIA Windows & Doors — Step-by-Step Guide
Step 1 — Select Your Window
Within the Quotec LIVE Designer, select Windows from the right-hand configuration menu.
The Window configuration panel will open, displaying:
Step 1 — Select the window to add to this building.
-
Click the product dropdown to view the available AMIA windows.
-
Use the Search windows field to locate a specific product or configuration.
-
Browse the available Barn, Louvre and Sliding Window options.
-
Review the product description, including dimensions, glazing type and performance ratings.
-
Select your preferred window to continue.
Each product is identified by its dimensions, glazing specifications and performance ratings, allowing you to distinguish between available configurations.
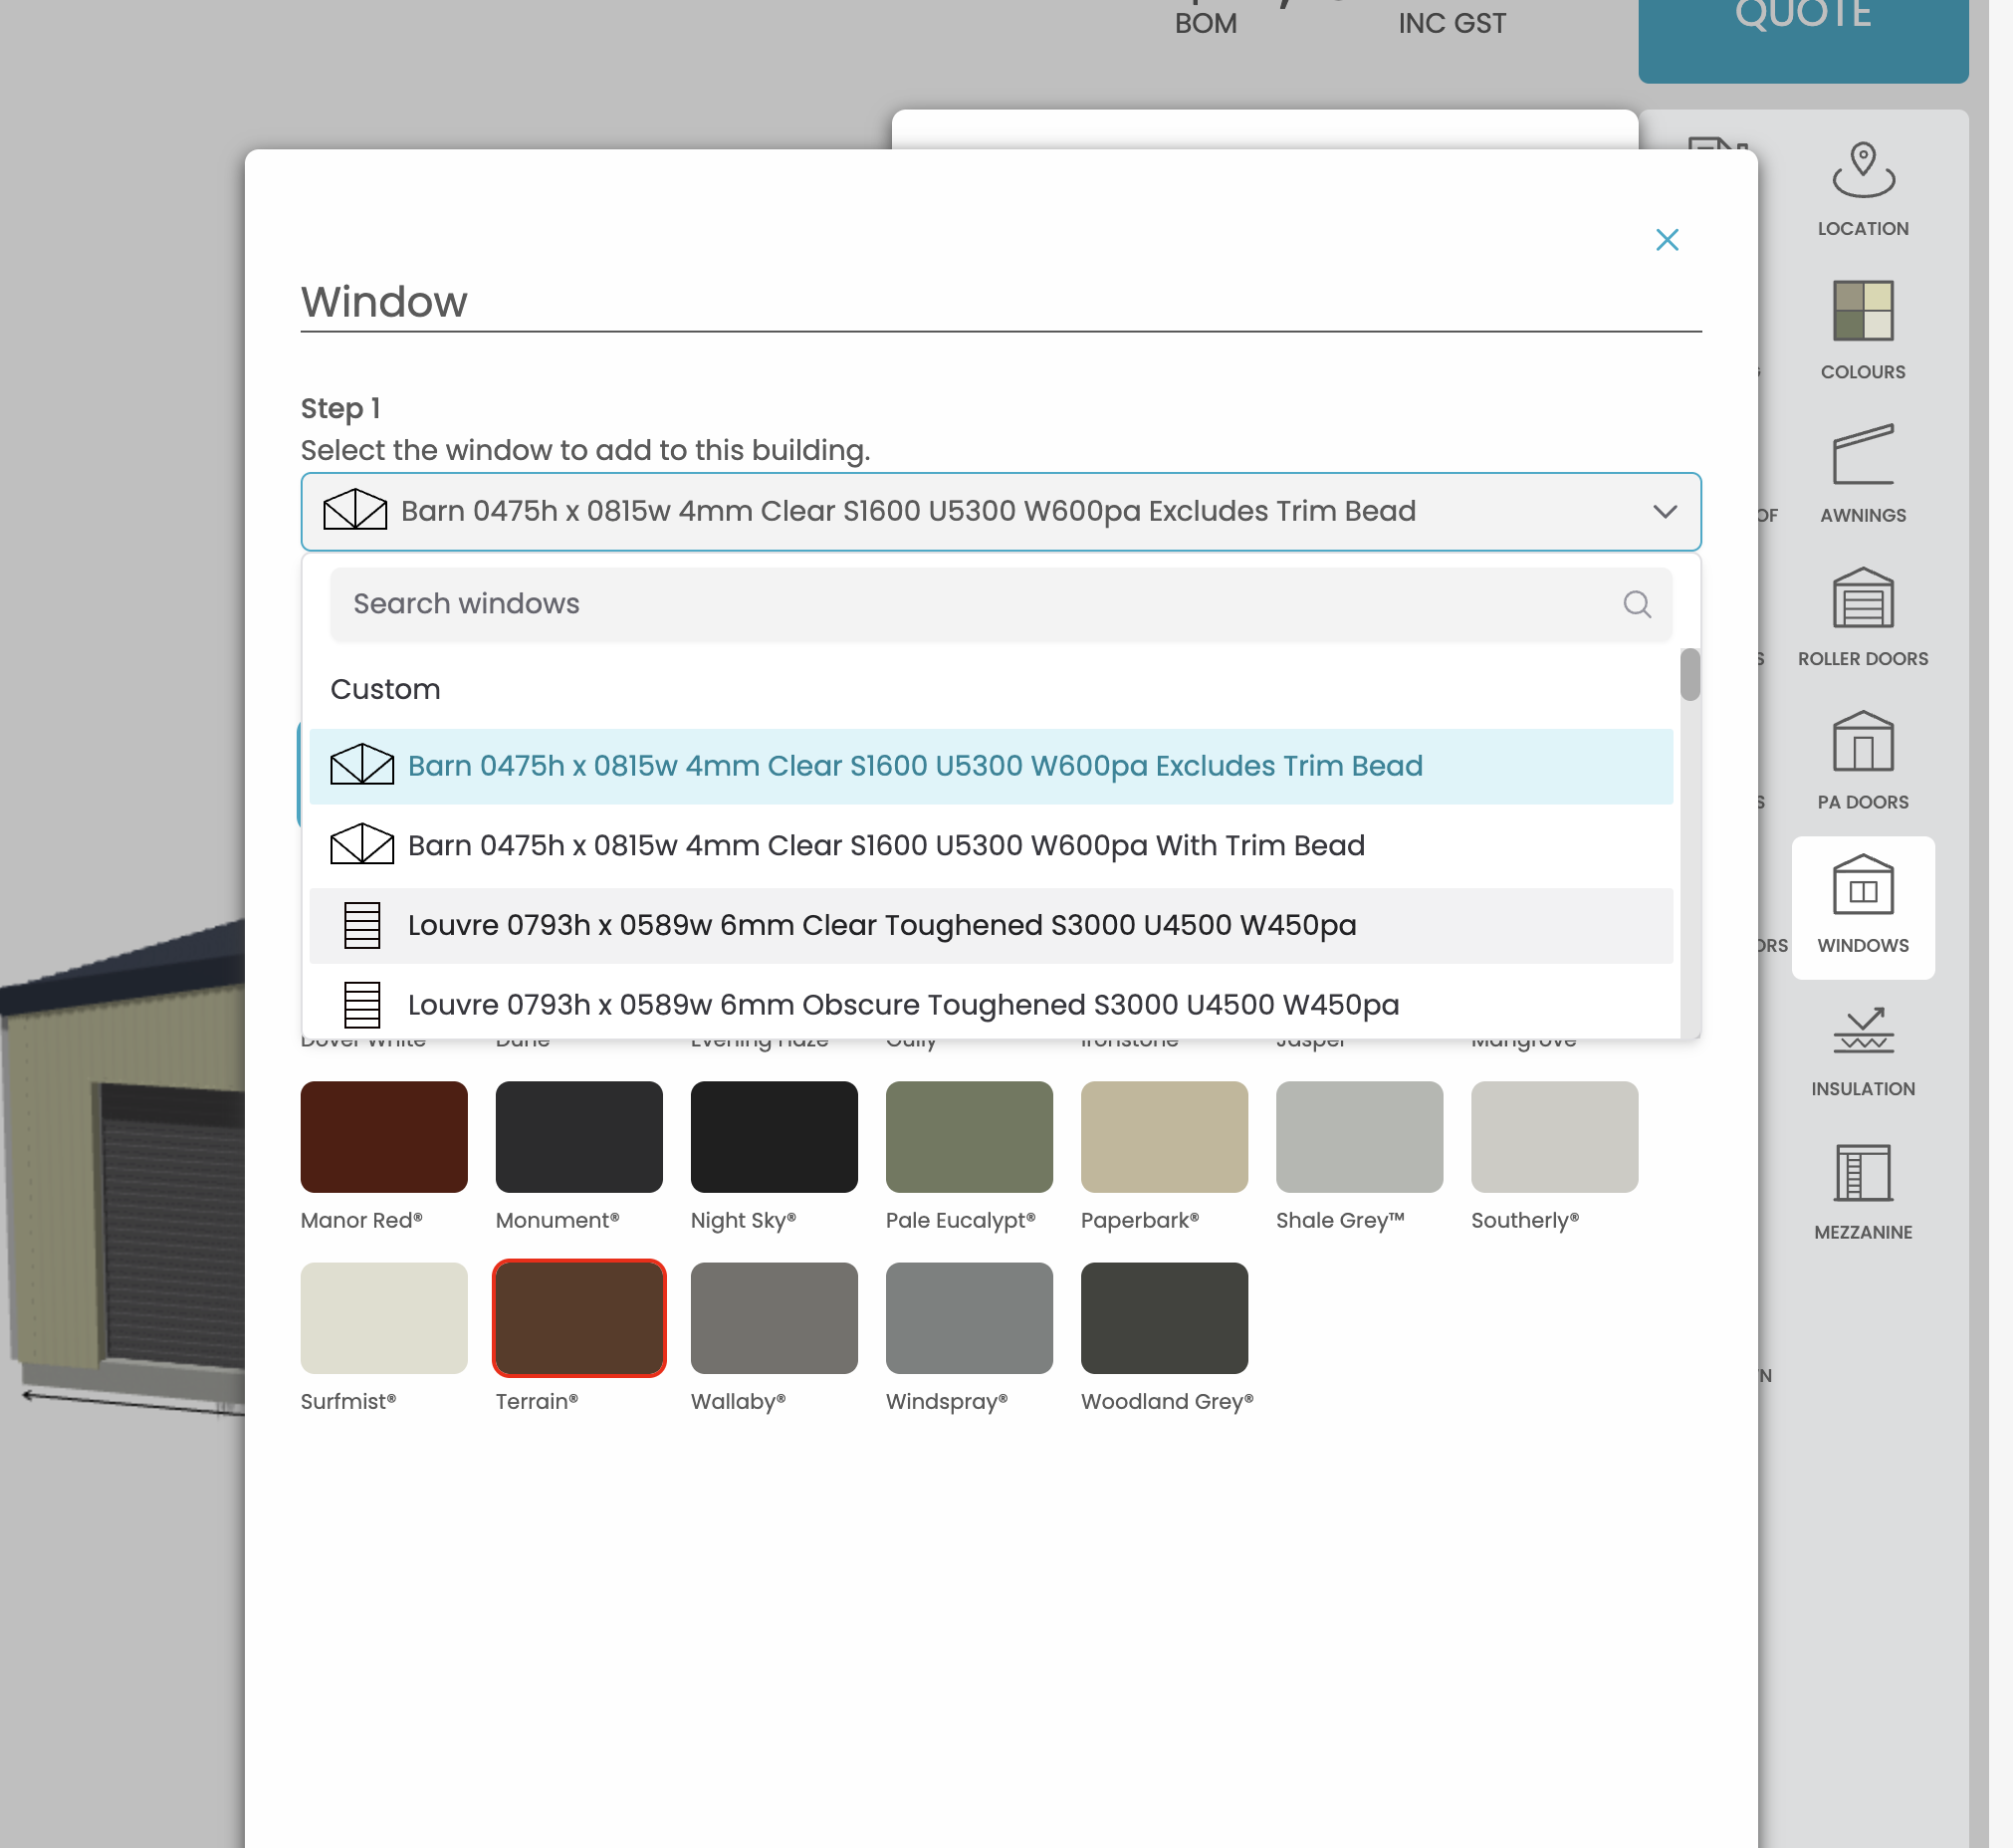
Tip: Products with identical dimensions may have different glazing and wind-pressure ratings. Review the full product description before making your selection.
Step 2 — Select Your Window Colour
Once you've selected your window, the Designer displays Step 2 — Select colour.
Choose your preferred frame colour from the available colour swatches.
The expanded AMIA range includes a variety of colours to complement different building designs and cladding finishes.
Available colours shown in the Designer include:
|
|
|
|
|---|---|---|
|
Basalt |
Bluegum |
Classic Cream |
|
Cottage Green |
Cove |
Deep Ocean |
|
Dover White |
Dune |
Evening Haze |
|
Gully |
Ironstone |
Jasper |
|
Mangrove |
Manor Red |
Monument |
|
Night Sky |
Pale Eucalypt |
Paperbark |
|
Shale Grey |
Southerly |
Surfmist |
|
Terrain |
Wallaby |
Windspray |
|
Woodland Grey |
|
|
To select your colour:
-
Review the available colour swatches.
-
Click your preferred colour.
-
Confirm the selected colour is highlighted.
-
Continue to the next configuration step.
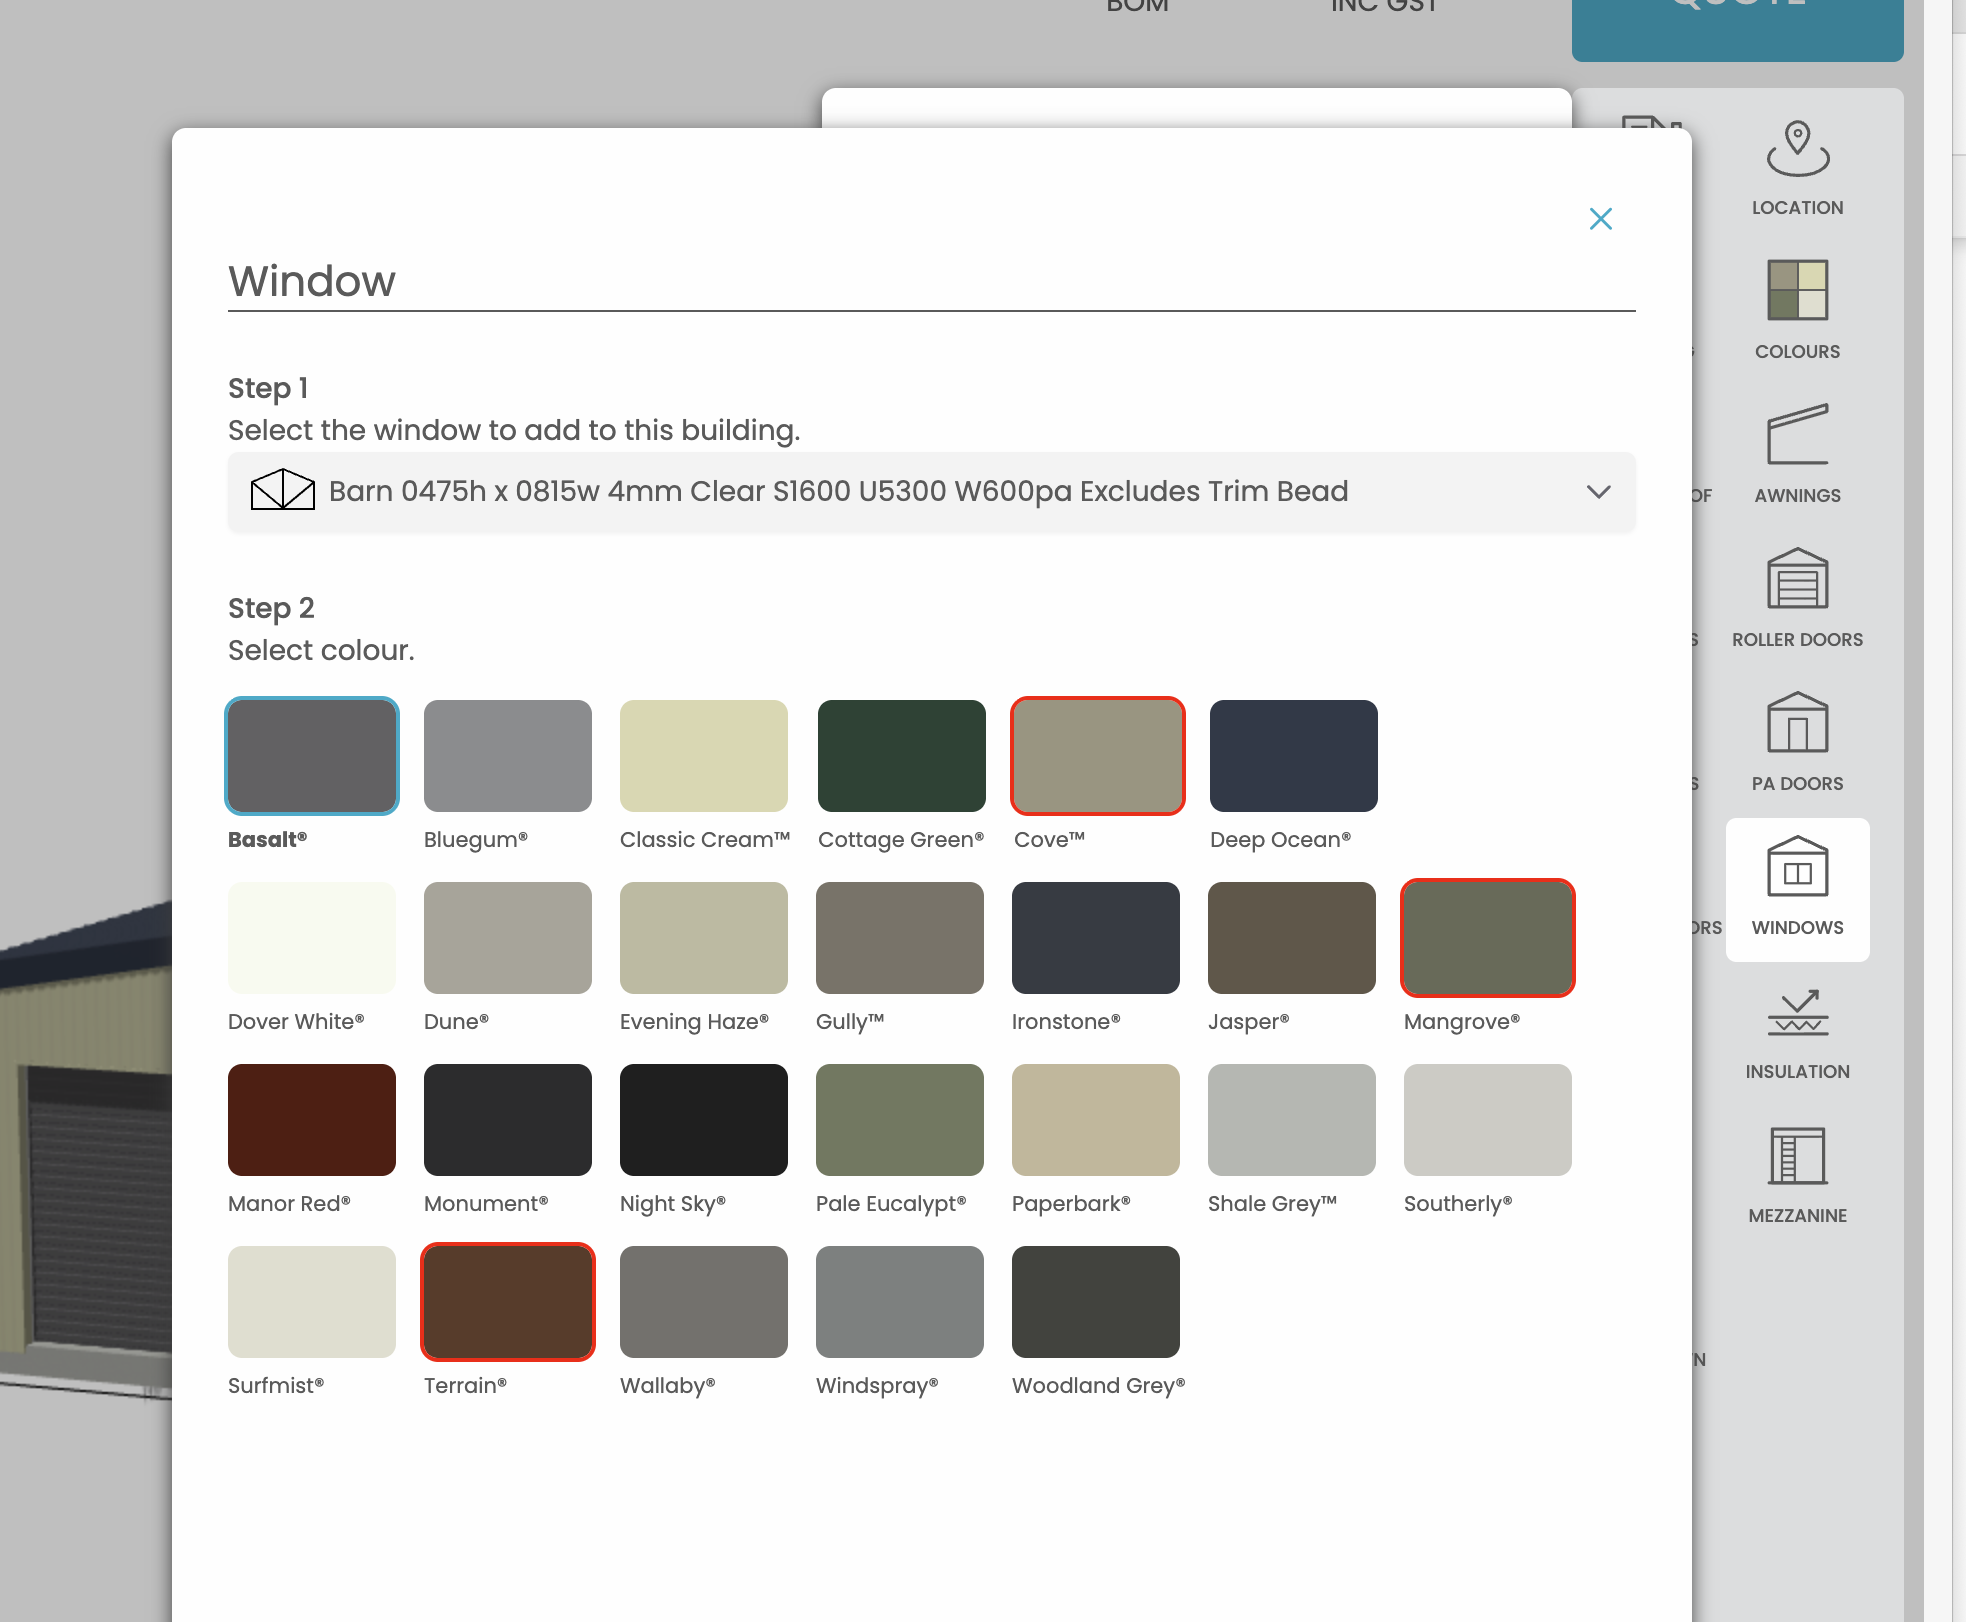
Please note: Available colours may vary depending on the selected AMIA product. Refer to the options displayed in the Designer for the current product configuration.Step 3 — Position Your Window
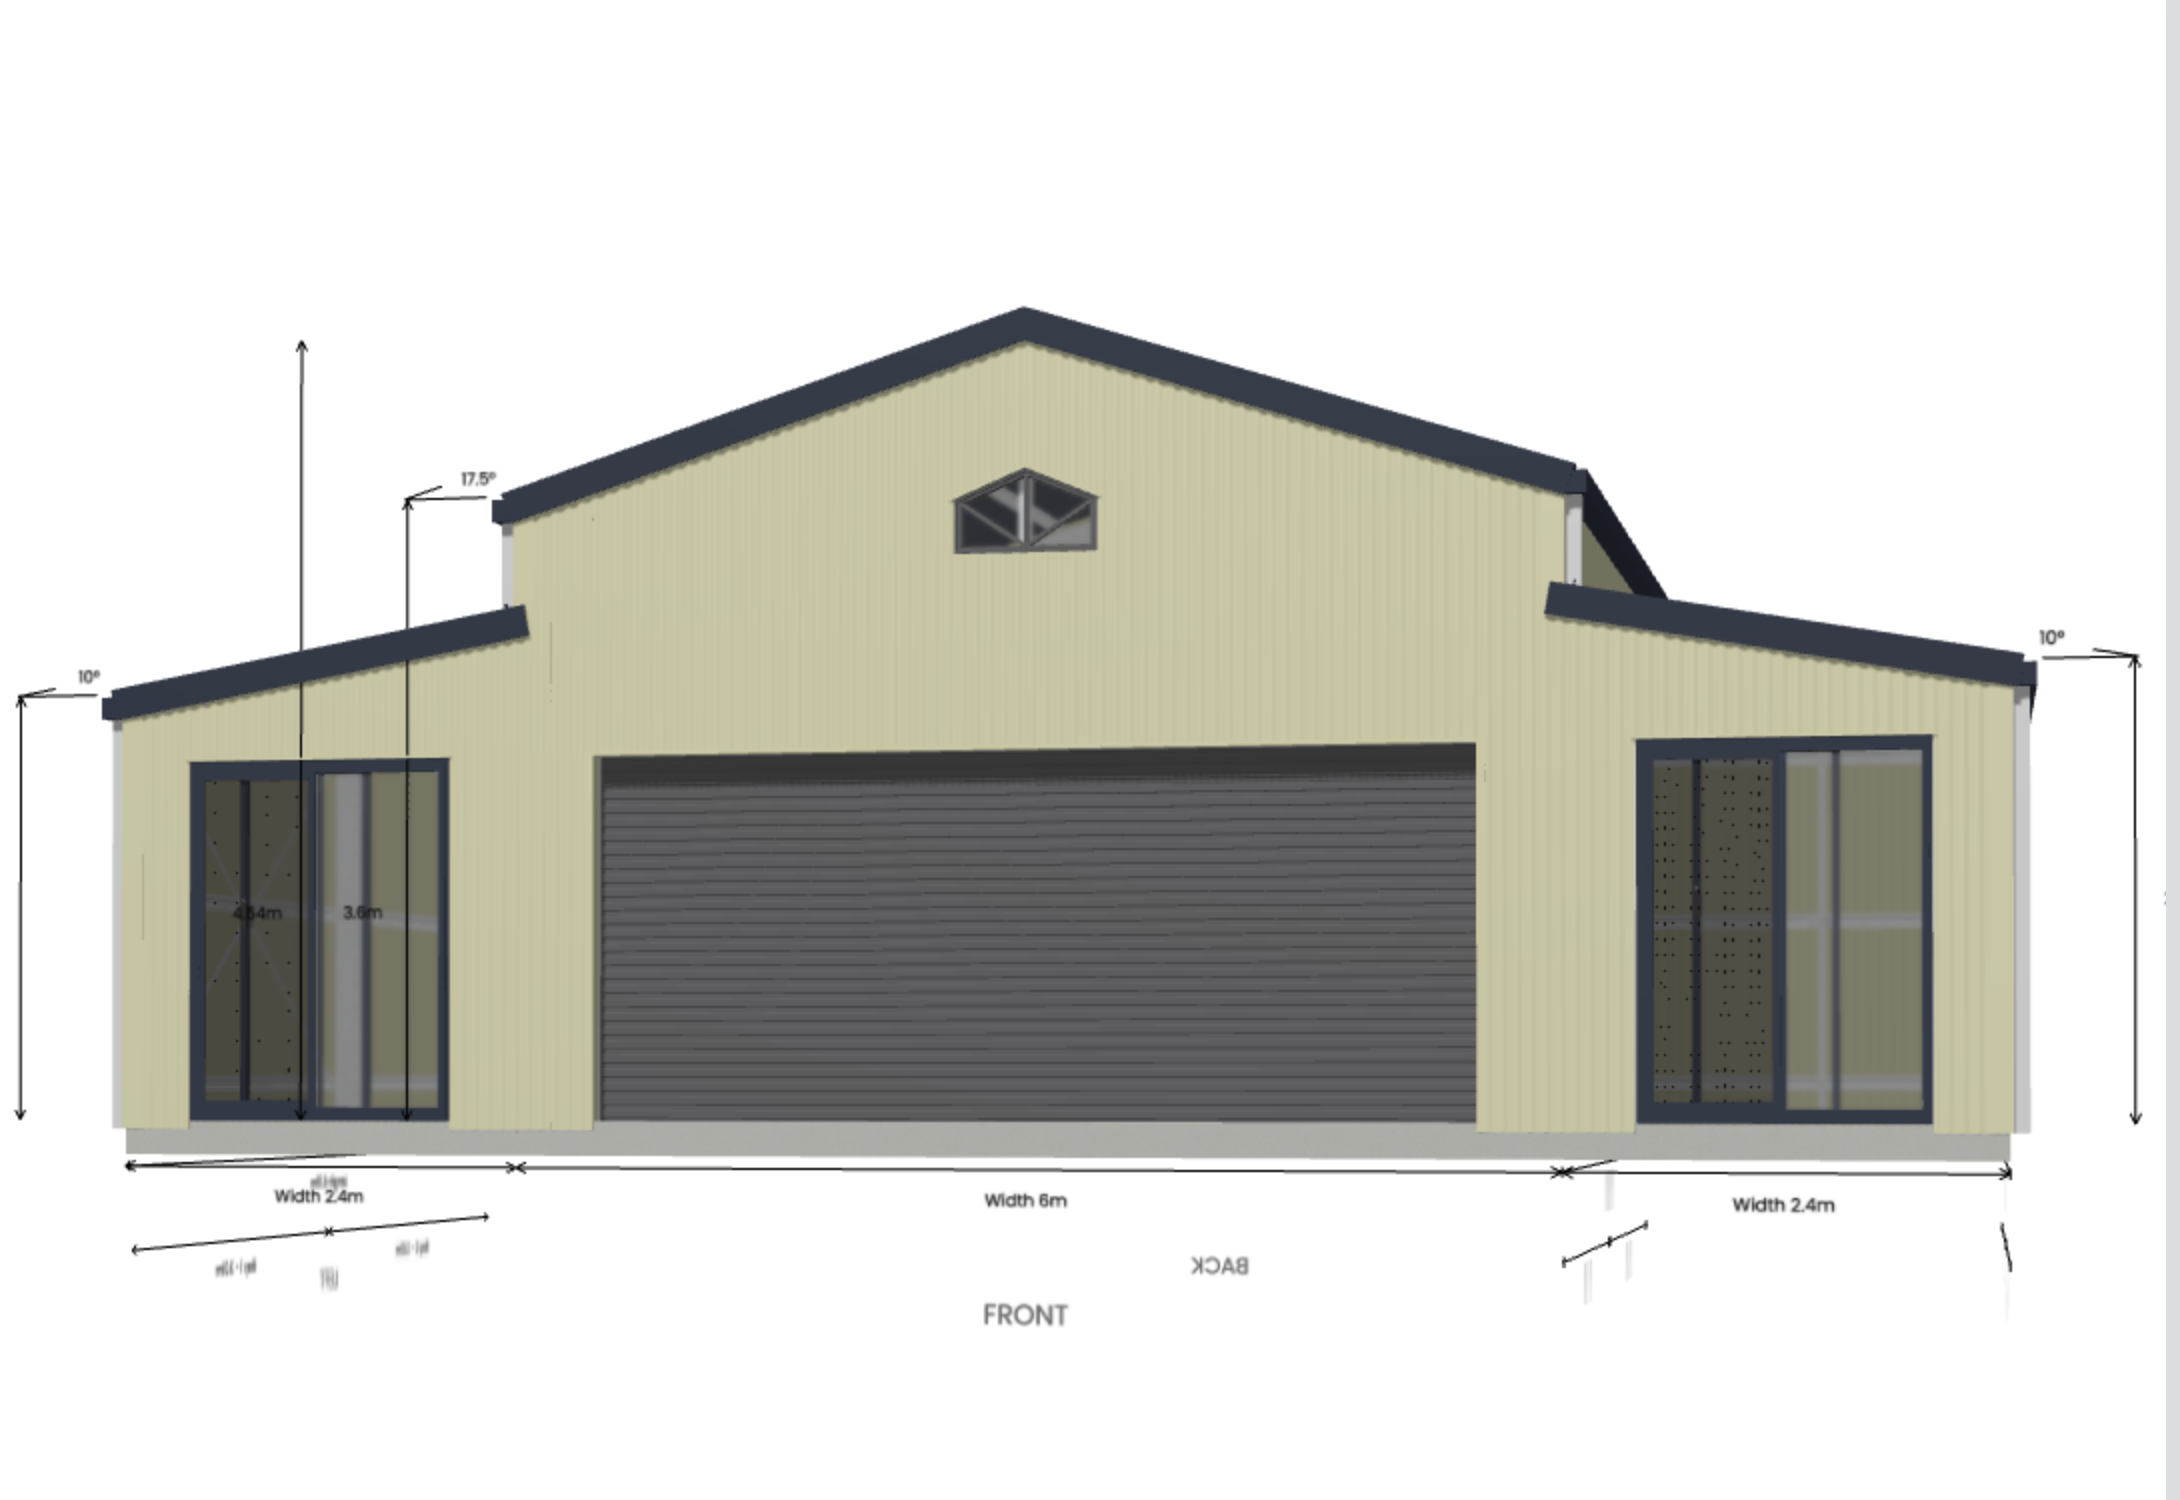
Once you've selected your window and frame colour, position the window on the required wall within the Quotec LIVE Designer.
The selected window will appear in the building's 3D model, allowing you to review its appearance and placement.
To adjust an existing window:
-
Select the window within the Designer.
-
Open the Window Details panel.
-
Locate the Position section.
-
Use the available positioning controls to move the window vertically.
-
Review the updated position in the building model.
The Designer provides a visual representation of the selected window, including its frame colour and configuration.
Tip: Review the window's position relative to other openings, wall framing and the intended internal layout before finalising your design.
Step 4 — Configure Window Screens and Barriers
Version 2.09 introduces additional screen and barrier configurations for compatible AMIA windows.
These options allow members to customise windows according to ventilation, insect protection and other functional requirements.
Available Screen Options
Depending on the selected window, the following options may be available:
|
Screen type |
Description |
|---|---|
|
None |
No additional screen selected |
|
Flyscreen — Fibreglass |
Standard insect-screen mesh |
|
Flyscreen — Aluminium |
Aluminium insect-screen mesh |
|
Flyscreen — Stainless Steel |
Stainless-steel insect-screen mesh |
|
Barrier Screen — Fibreglass |
Barrier screen configuration with fibreglass mesh |
Screens & Barrier Screens
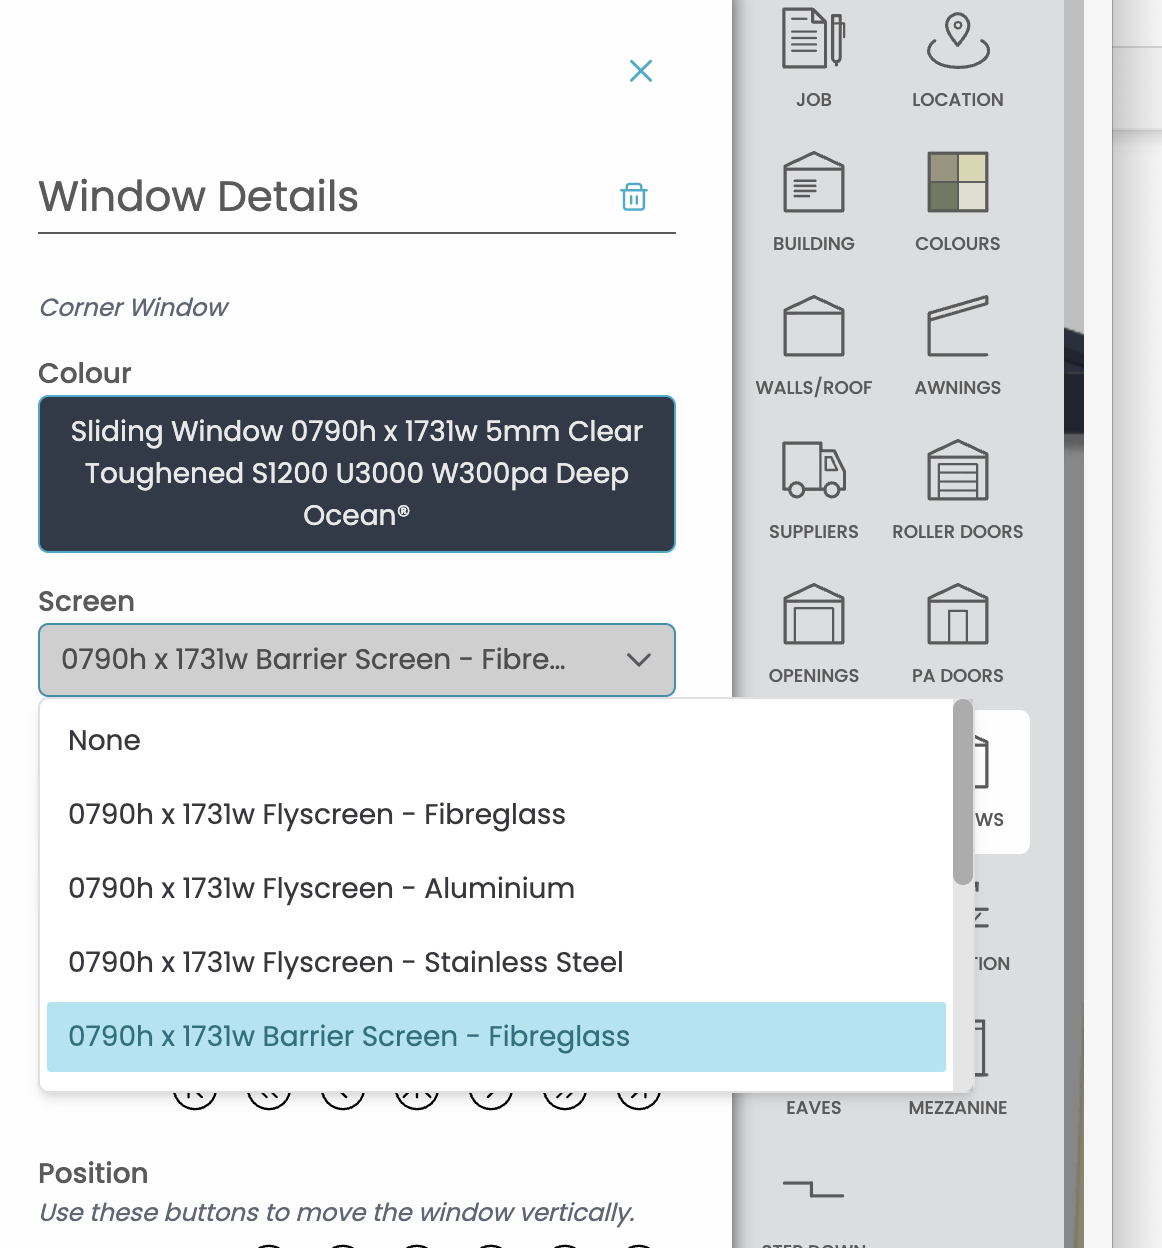
How to Select a Screen
-
Select the window in the Designer to open Window Details.
-
Locate the Screen dropdown.
-
Open the dropdown to view the compatible screen options.
-
Select the required screen type.
-
Review the updated window in the 3D model. The available screen configurations are matched to the selected window dimensions.
For example, a window measuring 0790h × 1731w displays corresponding screen options for that size.
Flyscreens Versus Barrier Screens
Flyscreens are primarily intended to provide insect protection while allowing ventilation through an open window.
Barrier screens incorporate additional screening or grille components, depending on the selected product.
Important: A barrier screen should not automatically be considered a certified security screen. Refer to the manufacturer's specifications where security, fall prevention or other performance requirements apply.
For more information, refer to AMIA — Screens for Sheds.
Step 5 — Add Timber Reveals
For supported Class 1a building applications, Quotec LIVE allows timber reveals to be added to compatible AMIA windows.
Timber reveals provide a finished internal surround and are particularly useful where the building incorporates internal wall linings.
Available Timber Reveal Options
The available configurations depend on the selected window dimensions.
For example, a 0790h × 1731w sliding window offers:
|
Reveal option |
Specification |
|---|---|
|
None |
No timber reveal |
|
116mm × 18mm |
Primed pine reveal, Poly Flash & Fix |
|
138mm × 18mm |
Primed pine reveal, Poly Flash & Fix |
|
185mm × 18mm |
Primed pine reveal, Poly Flash & Fix |
The different reveal depths allow members to select an option appropriate for the intended wall construction and internal finish.
How to Select Timber Reveals
-
Select the window within the Designer.
-
Open the Window Details panel.
-
Locate the Timber Reveal dropdown.
-
Review the available reveal dimensions.
-
Select the required configuration or choose None.
-
Review the completed window configuration.
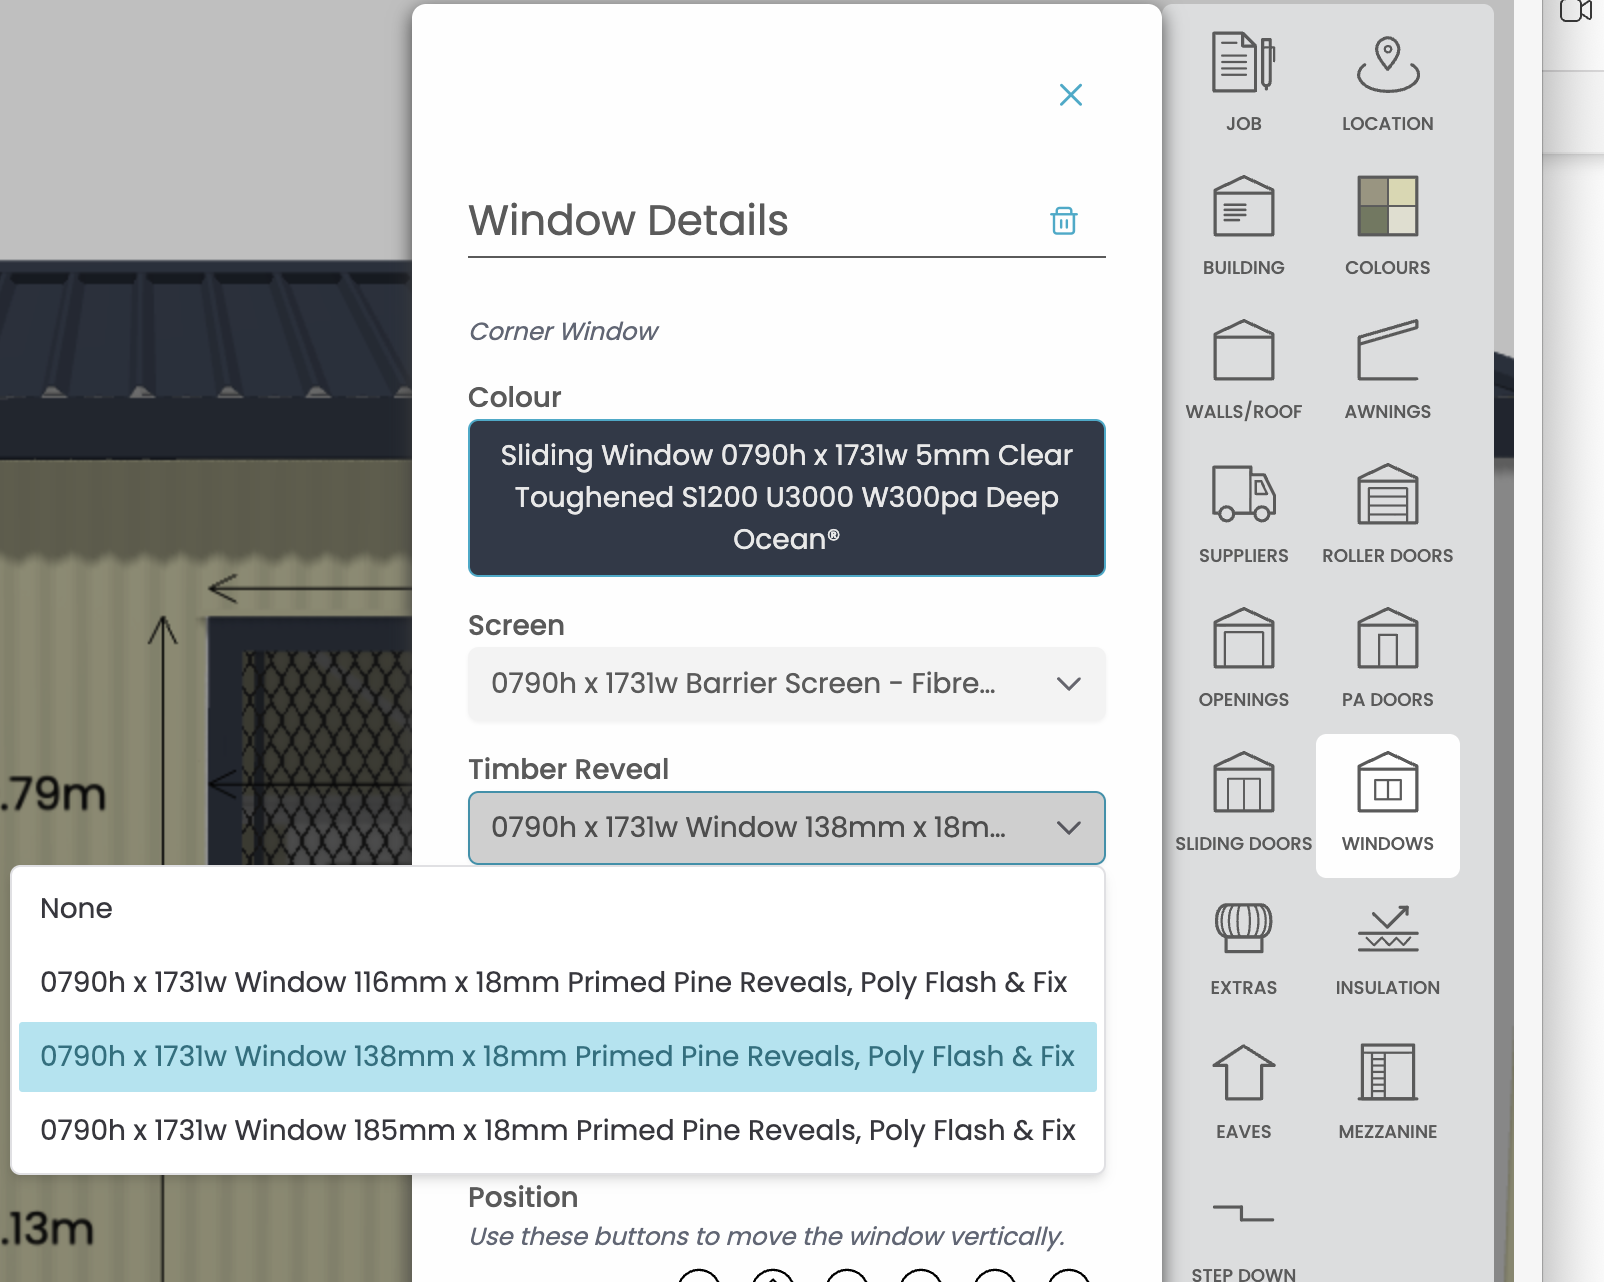
Tip: Consider the intended wall construction and lining thickness when selecting timber reveal dimensions.
Step 6 — Review Your Completed Window Configuration
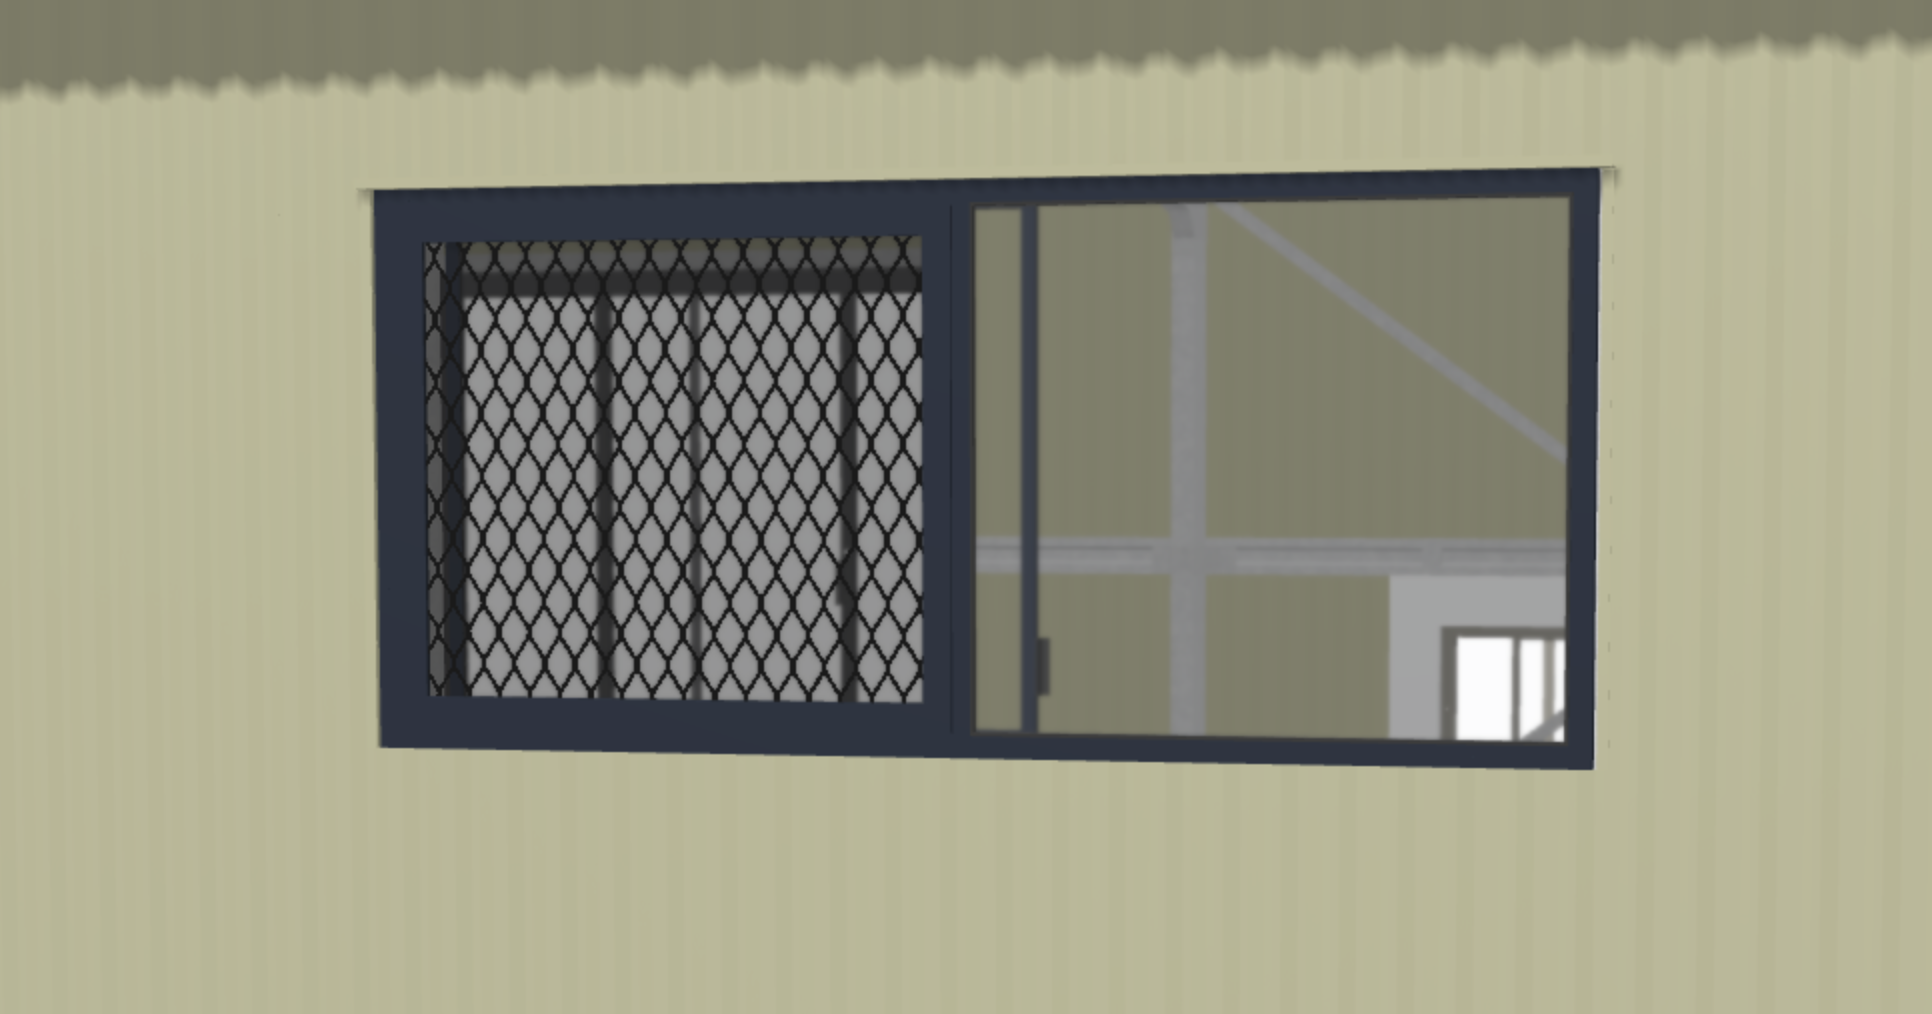
Once your window, colour, screen and timber reveal have been selected, review the completed configuration within the 3D Designer.
The model displays the selected window and its visible accessories, allowing you to assess the appearance of the finished building.
For example, the illustrated sliding window incorporates:
-
A 0790h × 1731w sliding window.
-
5mm clear toughened glazing.
-
Deep Ocean frame colour.
-
A fibreglass barrier screen.
-
A selected primed pine timber reveal.
The completed window demonstrates how the different AMIA product options can be combined within a single configuration.
Final Checks
Before completing your quotation, confirm:
- The correct window type and dimensions have been selected.
- Glazing and performance specifications are appropriate.
- Frame colour is correct.
- The required flyscreen or barrier screen has been selected.
- Timber reveals are configured where applicable.
- Window placement is suitable for the building layout.
- The completed design and pricing have been reviewed.
Additional Resources
For further information about AMIA products and their installation requirements, refer to:
If you require assistance configuring AMIA windows and doors, please contact the Quotec Support Team.